|
 Eating
Your Catch - From Landing Net to Table Eating
Your Catch - From Landing Net to Table
By Justin Hoffman
There's nothing more fulfilling, both to the taste buds and the
tummy, than that of freshly caught fish. Whether they are cooked
over the open flames of a campfire, pan-fried in the kitchen, or
baked on the BBQ, the tempting aromas and mouth-watering flavours
are just rewards for a hard day spent on the water. Add to that the
inherent health benefits that can be derived from regularly eating
our finny friends, and you've got yourself a true winner for the
dinner table.
So what are the processes involved in getting that fish safely from
net to table, you ask? Tie on an apron, put up your weary feet and
I'll let you in on the recipe for success.
The Initial Catch
If you intend to keep a fish when out on the water, a certain level
of care and preplanning should always be undertaken. Once the hook
is set, it is best to get your fish into the boat or up on shore as
quickly as possible. A landing net is a useful tool for speeding
this process up, and lessens the chance of your quarry thrashing
against the side of the boat.
Ensure that handling is kept to a bare minimum. Dropping the fish to
the floor or allowing it to flop at your feet will result in
bruising of the flesh - an injury that minimizes overall quality
dramatically.
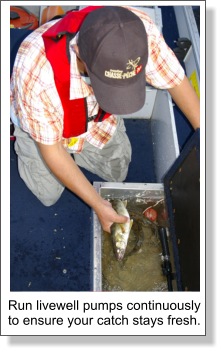 Keeping
your catch fresh is the most important step when it comes to eating
fish. There are two trains of thought on this procedure. If your
boat is equipped with an aerated livewell, then carefully place your
fish inside until it is time to come off the lake. Keep the pumps on
continuously, making sure to periodically change the water if your
model is not of the recirculating variety. This is important, as by
keeping your catch alive and at an adequate temperature will ensure
optimum freshness and firm flesh. Keeping
your catch fresh is the most important step when it comes to eating
fish. There are two trains of thought on this procedure. If your
boat is equipped with an aerated livewell, then carefully place your
fish inside until it is time to come off the lake. Keep the pumps on
continuously, making sure to periodically change the water if your
model is not of the recirculating variety. This is important, as by
keeping your catch alive and at an adequate temperature will ensure
optimum freshness and firm flesh.
If your boat is not equipped with a livewell, or if you are fishing
from shore, then you will need to kill and ice your fish
immediately. Your two options at this point are to fillet or gut
(see sidebar) your catch. Either of these methods will negate the
chances of contamination from body fluids, and will ensure that the
meat does not spoil. Once prepared in this manner, the fish should
be placed in a tightly sealed cooler and surrounded by ice. This
will preserve the meat until you make it back to the kitchen.
Try to stay clear from the use of fish stringers. Flesh can get
damaged easily with these devices, and although they may work well
in a pinch when casting from shore, they certainly are not designed
for use on boats.
Keep in mind to always store or travel with a section of skin
remaining on your prepared fish - this is used for identification
purposes if ever stopped or searched by conservation officers.
 Preparing
Your Catch Preparing
Your Catch
Once you've reached the kitchen, it's time to prepare your catch. If
your fish have remained alive up until this point, then the fillet
knife is your next means of business.
Fillet knives come in all styles and sizes. From regular varieties
to electric models, the choices can definitely be overwhelming. Most
average between 4 and 9-inches in length, with the standard sizes
being 4, 6, 7.5, and 9-inches. Bigger fish require a longer blade,
due in part to the wider girth and extra surface area. Smaller fish,
on the other hand, require a shorter blade for easier handling and
less overkill.
A 6-inch blade would work best for panfish, a 7.5-inch blade for
bass, walleye, and small trout, and a 9-inch knife for salmon, pike,
and larger fish. If you can only choose one blade, make it the
7.5-inch model. This will cover most bases.
Flex is a critical component of a fillet knife, and is contingent on
the thinness of the blade. It certainly comes into play when your
main quarry is panfish, as these fish require tighter angles and
sharper cuts.
Although it is common sense, an ultra sharp blade is a necessity.
Keep a filing stone or knife sharpener on hand, and give the metal
of the blade a quick touch up before each "operation" takes place.
For those that like to clean a mess of fish regularly, an electric
fillet knife might be your best option. They can effortlessly work
through fish, saving time, effort, and patience. Many models on the
market have rechargeable battery packs, 12V lighter plug (great for
back wood fishing), 110V wall plugs, and even 12V battery post
clips. Although they have a bit of a learning curve, and will take
some time to get used to, the benefits are certainly viable.
Once you have filleted, cut into steaks, or gutted your catch, you
will next want to decide whether to eat your fish that day, keep it
fresh, or put it in a deep freeze.
The following are some guidelines:
No matter what you intend to do with your catch; washing it
thoroughly with cold water is the first step. The same goes for your
hands before touching the fish, as well as making sure all areas of
your workstation are sanitized. Once the fish is clean, soak off any
excess moisture with paper towel.
Fresh fish can be kept in the refrigerator for 2 to 3 days. Some
folk may leave it longer, but why risk your health? To ensure
optimum freshness, cover tightly with plastic wrap and place in the
coldest part of your fridge - namely under the freezer or in the
"meat-keeper" drawer.
Freezing Your Catch
Utilizing your freezer is a common practice that will dramatically
increase the life of your catch. How you choose to store it,
however, will either make or break the taste and quality.
The following chart outline the approximate shelf life for the most
common species of fish:
Species
Lake Trout, Rainbow Trout, Whitefish, Carp, Catfish, Lake Herring,
Smelt, Northern Pike 3 - 5 months of storge.
Chinook Salmon, Coho Salmon, White Bass, Sucker, Burbot 5 - 8
months of storge
Walleye, Yellow Perch, Bass, Crappie, Bluegill 8 - 12months of
storge
The two most common problems with frozen fish is the development of
off-flavours due to the oxidation of tissue lipids, and freezer
burn, which is caused by moisture loss. Practicing proper freezer
methods and preparations can greatly reduce, or abolish these
altogether.
Freezer Bags
The most popular and common choice for angling enthusiasts, the
freezer bag offers excellent storage capabilities when used
correctly.
Cut fish or fillets into individual pieces and sort into meal-size
servings. Place flat into freezer bags. In order to alleviate
oxidization, remove as much air as possible before sealing the bag
tight. A trick is to use a drinking straw to suck out any O2. I
prefer the zip-lock bags for ease of use and reliability.
Another key technique is to encase your fish in a block of ice. This
can be done in one of two ways. The first is to fill the bag up with
water and fillets. Ensure that the meat is covered completely, and
then place in freezer. Once this solidifies, the burning and
oxidation processes become negated.
Glazing is also a good choice. Freeze whole or portions of whole
fish in a freezer bag. Remove frozen fish from plastic, dip in ice
water and return to freezer. Repeat dipping and freezing until the
ice glaze is 1/8- to 1/4-inch thick.
For added barrier protection, place freezer bag containing fish into
a larger sealed bag.
Label all packages with the date, specie, and weight or number of
pieces. Keep each bag's weight to under a pound, as this will make
it easier for thawing purposes.
Vacuum Packaging
Although this system can be pricey, the rewards are well worth the
initial cost of the unit and the accompanying oxygen-barrier bags.
A vacuum unit is an electrical machine that sucks out the air from
the bag containing your fish. Once completed, it uses heat to seal
the plastic tight. This is a very effective preparation method for
those that do a lot of freezing, and most problems that occur around
freezing are eliminated from the equation.
Comparison shop when picking up a unit, and see which style fits
your needs and budget.
Thawing Out the Fish
Once you have decided on a meal from the freezer, thawing the meat
before cooking is a prerequisite. If you have the foresight, taking
out what you need the day before is the best option. Place the bag
of fish on a plate in the refrigerator, and allow approximately one
day for each pound of weight.
If you need to speed the process up, or you have made a
spur-of-the-moment decision to have fish, then placing the freezer
bag in a tub of cold water or under a running tap will do the trick.
(An average package should take one to two hours to defrost.) Never
leave packages out in room temperatures without the addition of
water.
If you are really in a bind, your microwave oven can do the trick.
It is the fastest method, but is one to be cautious with. Only use
the defrost setting, and stop the process when the fish is still icy
but pliable. Failure to do this will cause the edges of the meat to
cook, which ultimately spoils the fish. And remember - do not
refreeze fish that have already been thawed out.
 Ring
the Dinner Bell Ring
the Dinner Bell
You are finally at the stage to cook up your catch. There are
literally thousands of methods and recipes for cooking fish, from
the very basic to the more advanced. The gamut runs from grilled,
poached, and fried to baked, steamed, and sautéed. My advice is to
find a few recipes you like and to experiment with each style. Most
of all - just have fun.
One secret to cooking perfect fish is simple - do not overcook. Fish
toughen and lose moisture and flavour when kept in the heat too
long, rendering them dry and tasteless. Another rule of thumb is 10
minutes per inch and 140 degrees F internal temperature. Follow
those three tips and you'll be on the track to success.
Keeping a fish or two for the table is a simple practice that can
bring hearty rewards. Enjoy some this season, practice selective
harvesting…and bon appetite!
Gutting a Fish
1. Insert your knife tip into the anal vent, and draw the blade
toward the head, splitting the fish to the base of the gills.
2. Spread the abdominal cavity with your fingers, and drag the
entrails out.
3. Remove the head if desired, making a cut just behind the gills.
4. Rinse the body cavity out with a steady stream of cold water.
Selective Harvesting
Most of Ontario's fish are excellent to eat, and keeping a few for
the table is a perfectly acceptable and important part of our
fishing heritage.
Selective harvesting is a commitment to taking only those fish that
you can reasonably eat, while choosing species that are more
abundant and prolific, and releasing those less in abundance and of
greater size. This philosophy is a great one to follow.
Panfish are an excellent species to eat - not only do they taste
delicious, but they are very common in most bodies of water and can
take the pressure that comes with removing a few for the pan. Small
to average-sized bass, walleye, and pike are also prime candidates
for the table.
Larger fish, and of course those of trophy proportions, should be
released for their spawning superiority, so our lakes, rivers, and
streams will continue to provide us with the great sport of fishing
that we all so enjoy.
Justin's Foiled Fish
Here is a favourite recipe of mine that was devised one day at the
cottage. I'm certain it won't disappoint your taste buds!
1. Select fillets from your favorite specie of fish. I've found that
panfish, bass, or walleye work well.
2. Cut fillets into four to five-inch pieces, and place onto flat
sheet of tin foil. I use five or six fillets for each sheet.
3. Place a heaping tablespoon of butter or margarine on top of
fillets.
4. Sprinkle a very thin layer of commercial fish batter on top of
the fillets. (I've found that Fish Crisp works well.)
5. Place assorted spices on top of fish, including Montreal Smoked
Meat and Lemon and Garlic. Add a dash of salt and pepper for
seasoning.
6. Squeeze a splash of fresh lemon across the fish.
7. Wrap fish up in tin foil, leaving no openings in package.
8. Place on BBQ over medium heat, turning every few minutes.
9. Cook for 10 to 12 minutes and enjoy.
|